Create RDS Database
In this section, you will launch an Amazon RDS PostgreSQL database instance, connecting it directly with the EC2 compute instance in the VPC private subnets to store data for the Rookwork project.
Before starting, make sure that you have created the necessary Security Groups. See the detailed instructions in Part 3 – Create Security Groups (Step 1) of article 5.3.
Step 1: Launch Amazon RDS PostgreSQL
Once the network and EC2 instance are ready, start creating the relational database instance:
- Search for and navigate to the RDS service on the AWS Management Console.
- Click Databases on the left menu, then click Create database.
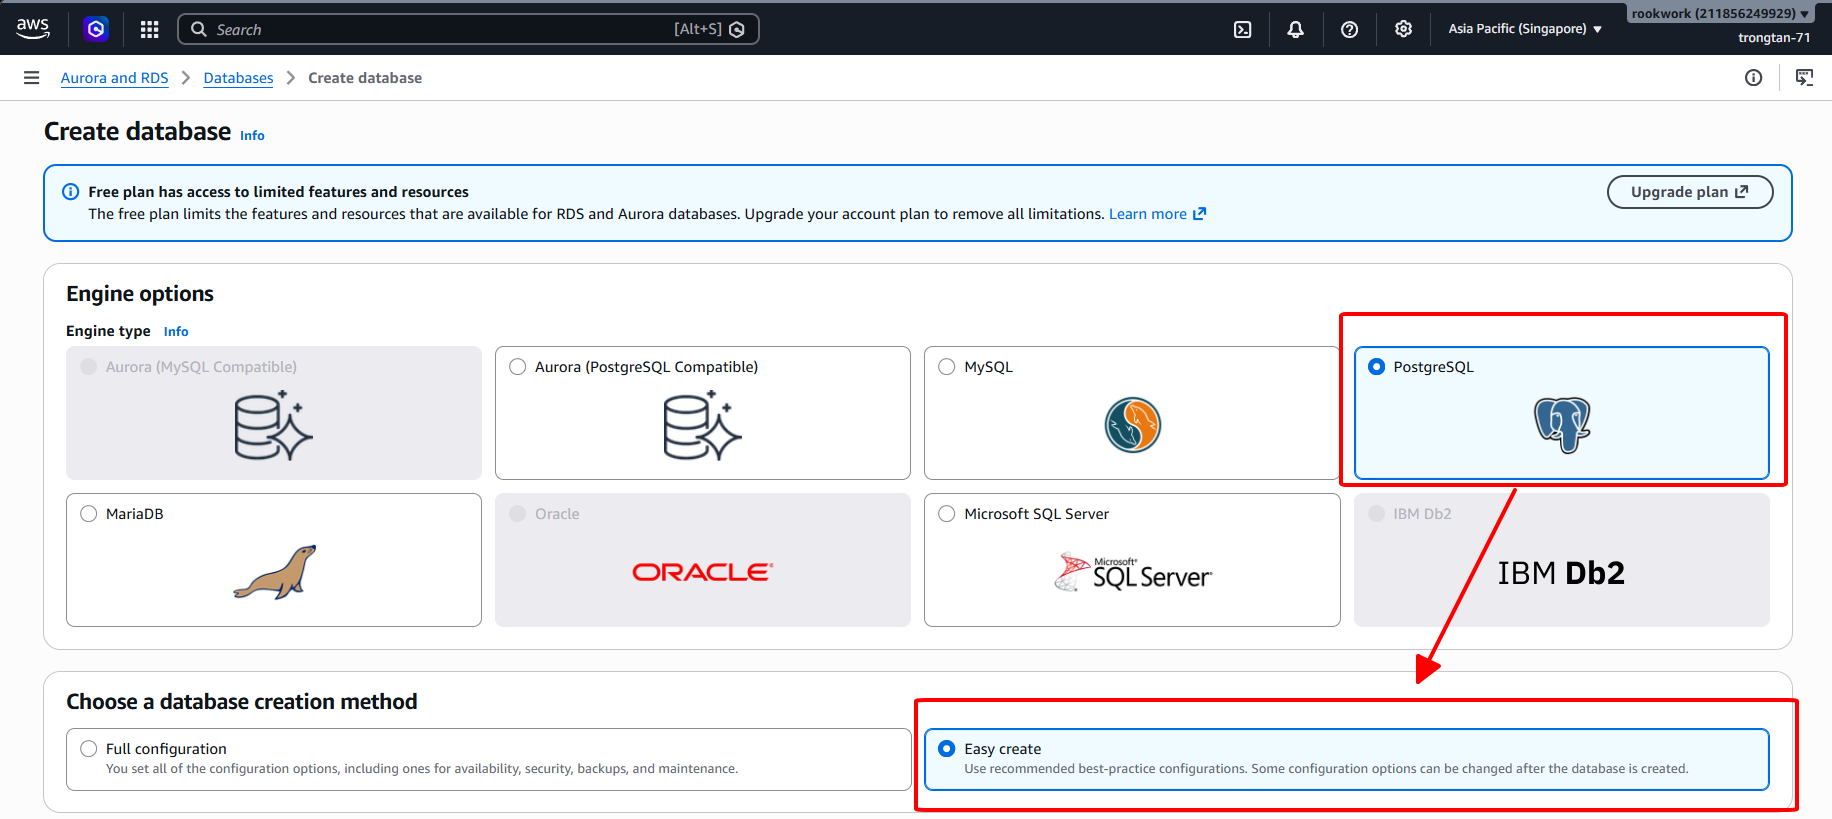
- Under Engine options, select PostgreSQL.
- Under Choose a database creation method, select Easy create to use recommended best-practice default configurations.
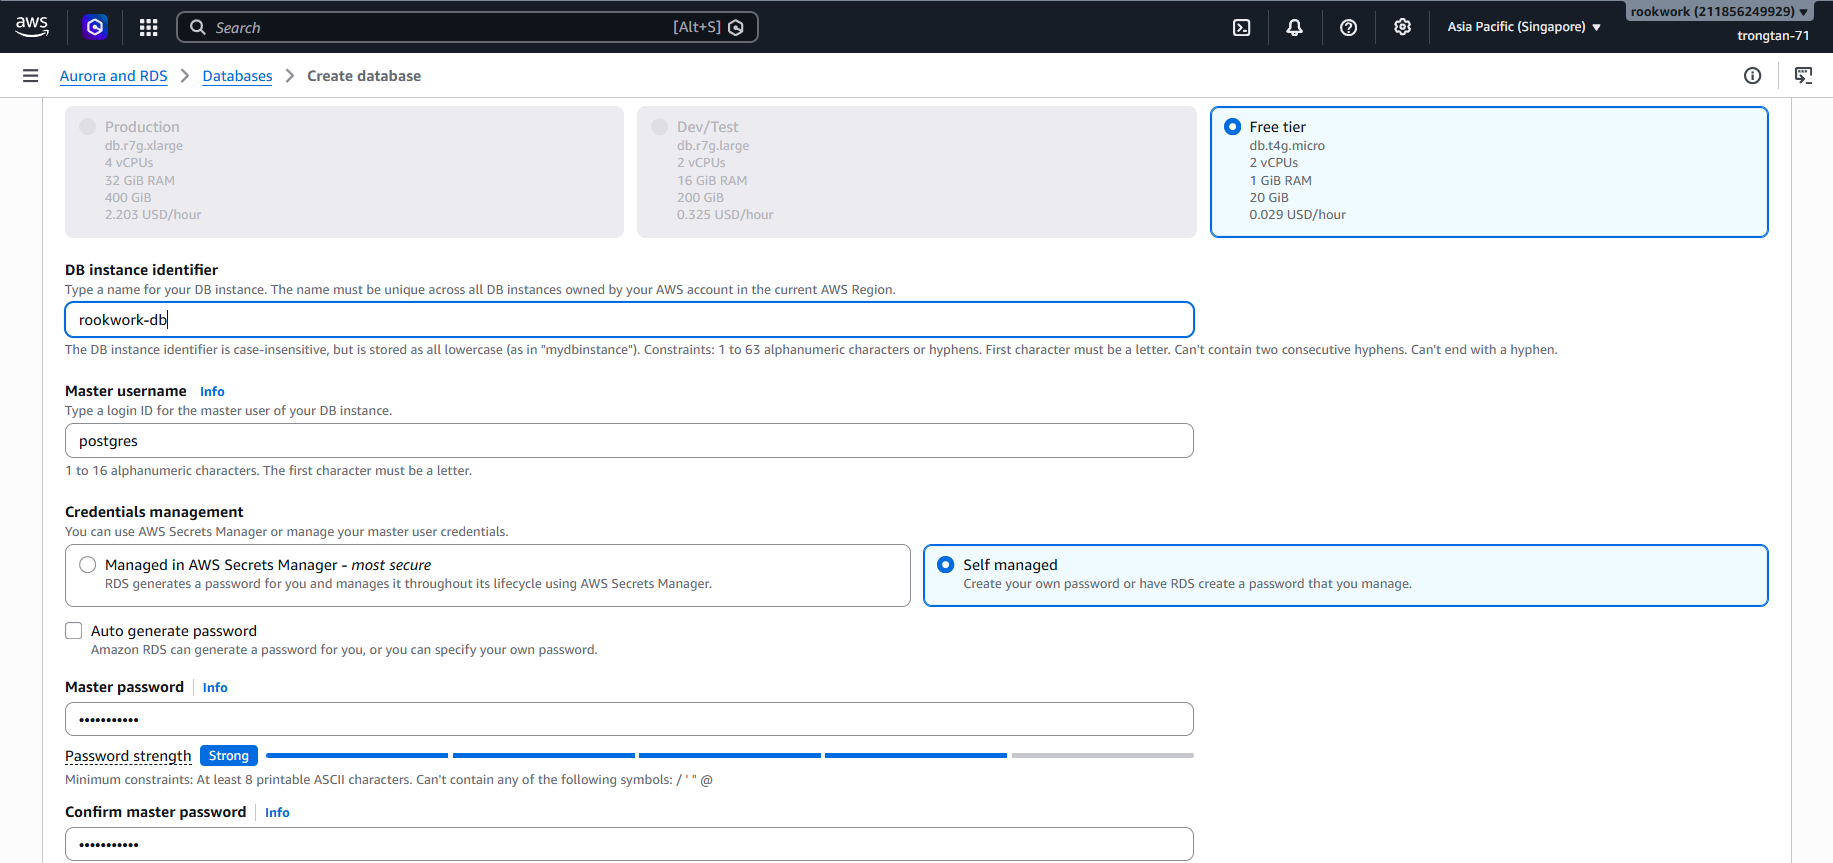
- Under DB instance size options, select Free tier to run a cost-efficient setup (
db.t4g.micro, 2 vCPUs, 1 GiB RAM, 20 GiB Storage). - DB instance identifier: Enter a unique name for your database (e.g.,
rookwork-db). - Master username: Default is
postgres. - Credentials management: Choose Self managed to define and manage your master user password.
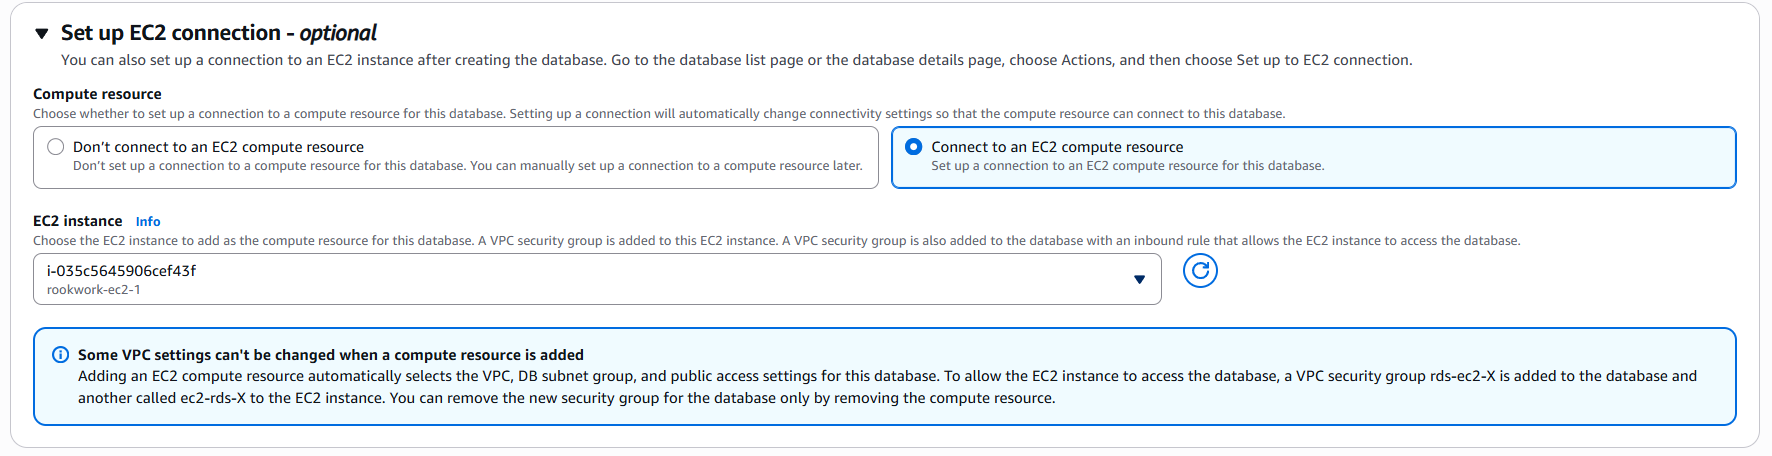
- Under the Set up EC2 connection - optional section:
- Select Connect to an EC2 compute resource.
- Under the EC2 instance dropdown, select your application server (e.g.,
rookwork-ec2-1/i-035c5645906cef43f). - Note: This option allows Amazon RDS to automatically create and assign appropriate security groups (
rds-ec2-Xfor the database andec2-rds-Xfor the EC2 instance). This automatically permits secure traffic from your EC2 instance to the RDS Database port without requiring manual routing rules.
- Click Create database at the bottom to start provisioning. The process will take a few minutes until the database status changes to Available.
Step 2: Configure Spring Boot to Point to RDS
To enable the Spring Boot application running on the EC2 instance to connect to the Amazon RDS PostgreSQL database, update the project configuration file:
- Open the configuration file
src/main/resources/application.properties(orapplication.yml) in your project source code. - Add or update the database connection properties as follows:
spring.datasource.url=jdbc:postgresql://rookwork-db.cxegees2u15z.ap-southeast-1.rds.amazonaws.com:5432/postgres
spring.datasource.username=postgres
spring.datasource.password=your_password_here
spring.datasource.driver-class-name=org.postgresql.Driver

spring.jpa.hibernate.ddl-auto=update
spring.jpa.database-platform=org.hibernate.dialect.PostgreSQLDialect
spring.jpa.show-sql=true
Note: The configurations above are temporary settings for checking local connectivity. Later, we will optimize this configuration by utilizing environment variables in the CI/CD pipeline to secure sensitive connection credentials.
Step 3: Verify the Connection from EC2 to RDS PostgreSQL
Once the RDS database status changes to Available, execute the following steps from the EC2 instance to verify the connection:
- Connect to the EC2 instance (using SSM Session Manager as described in Step 5 of the previous section).
- Install the
psql(PostgreSQL Client) utility on the EC2 instance:sudo dnf install -y postgresql15 - Connect to the RDS PostgreSQL database using the following command:(Replace
psql -h <RDS_ENDPOINT> -U postgres -d postgres<RDS_ENDPOINT>with the actual RDS instance Endpoint found on the AWS RDS Console details page) - Enter the master user password configured in Step 2. When the command prompt switches to
postgres=>, it proves that the EC2 instance has successfully connected to the RDS PostgreSQL database through the VPC internal network.

Note: The image above illustrates a successful terminal session connection. This test and installation ensure that your application running on EC2 can successfully communicate with and securely store data in the RDS PostgreSQL database.