Create EC2 & Verify Private Environment
Overview
In this workshop, you will learn how to deploy EC2 instances securely inside private subnets within an Amazon VPC. We will set up two EC2 instances named rookwork-ec2-1 and rookwork-ec2-2 within the private subnets of your custom VPC. You will configure their network settings to ensure they remain isolated from direct public internet access, and verify the environment configuration (local IP, internet route via NAT Gateway, and installation of key dependencies such as Docker, Node.js, and Git).
Step 1: Launch rookwork-ec2-1
- Open the AWS Management Console and navigate to the EC2 Dashboard.
- Click on Launch instances.
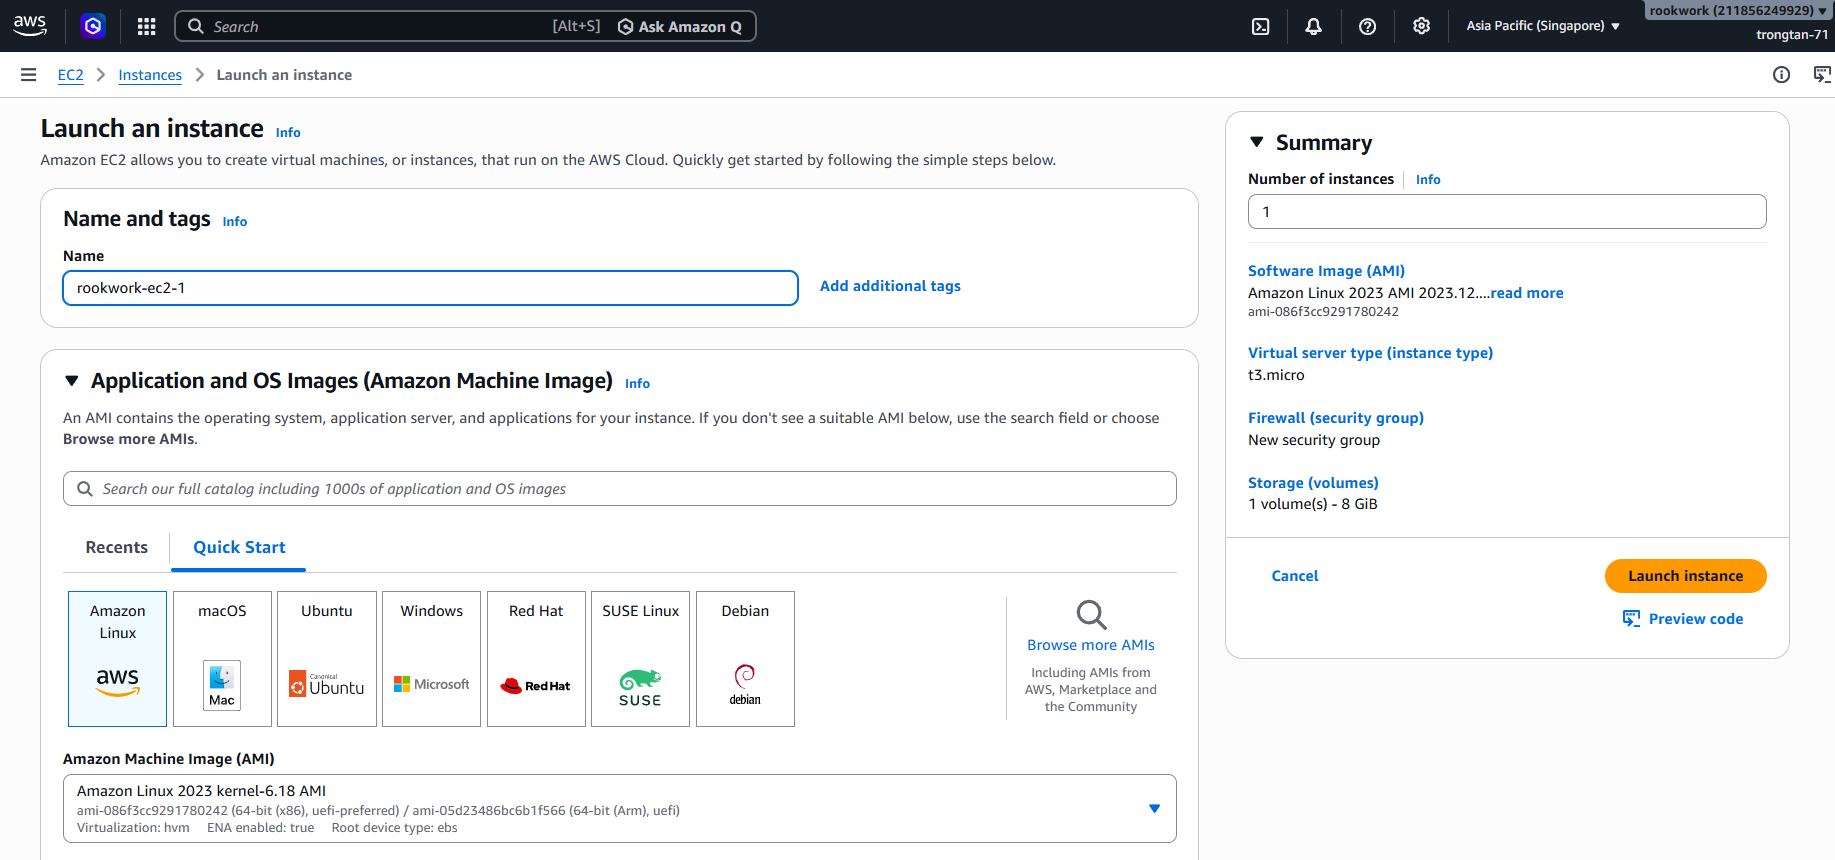
- Under Name and tags, enter
rookwork-ec2-1in the Name field. - Under Application and OS Images (Amazon Machine Image), select Amazon Linux 2023 AMI (or the AMI required for your project).
Step 2: Configure Network Settings
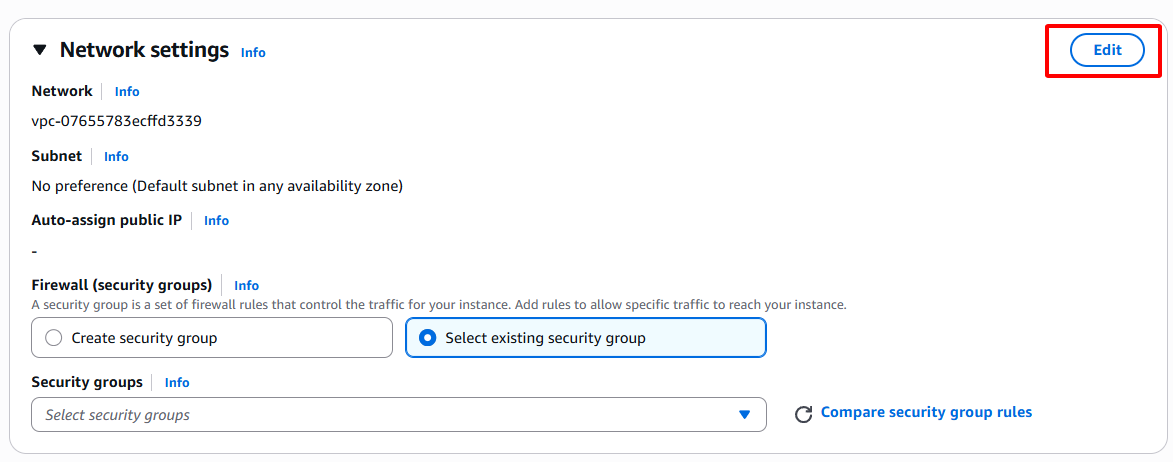
- Scroll down to the Network settings section and click Edit (top-right of the box).
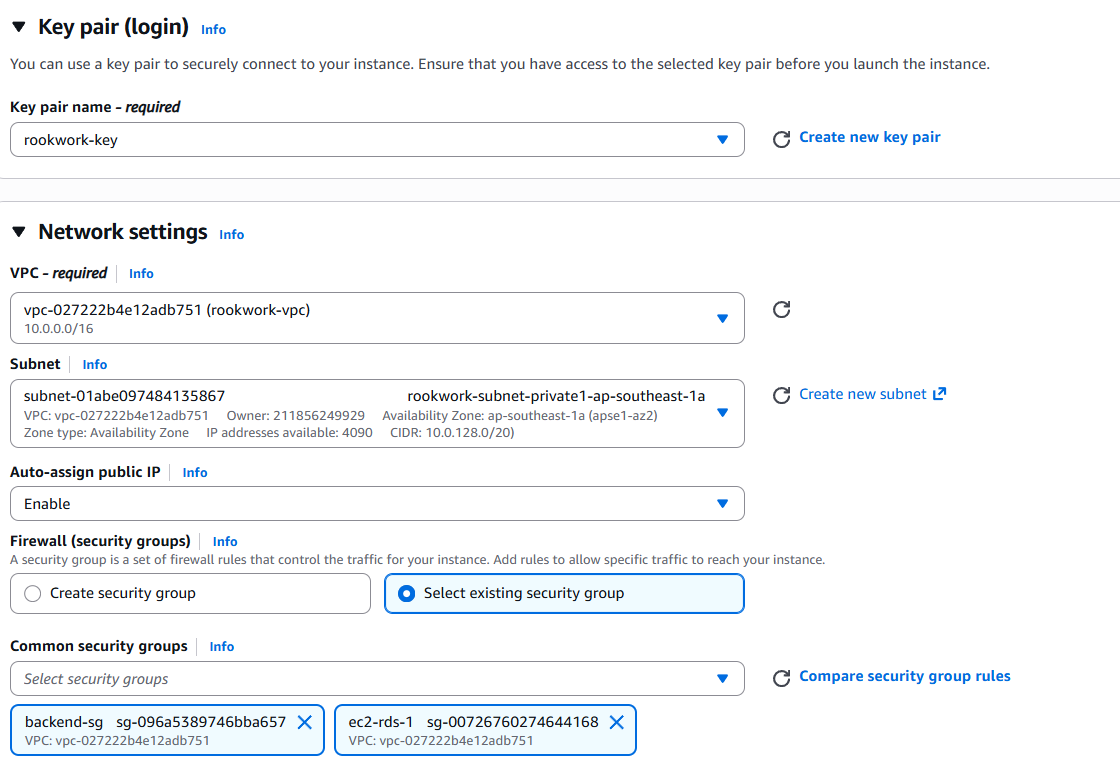
- VPC: Select your custom VPC (e.g.,
Rookwork-VPC). - Subnet: Select a Private Subnet (e.g.,
rookwork-private-subnet-1). - Auto-assign public IP: Select Disable (this guarantees the instance does not receive a public IP address and remains private).
- Firewall (security groups): Select or create a security group configured to allow inbound traffic only from the Bastion host, Application Load Balancer, or specific internal VPC ranges.
Step 3: Key Pair and Storage
- Under Key pair (login), select your existing key pair or create a new one to securely connect to the instance later.
- Under Configure storage, verify the size and type of the root volume (e.g., gp3).
- Click Launch instance on the right panel to provision the instance.
Step 4: Launch rookwork-ec2-2
- Follow the same procedure as above to launch the second EC2 instance.
- In the Name field, enter
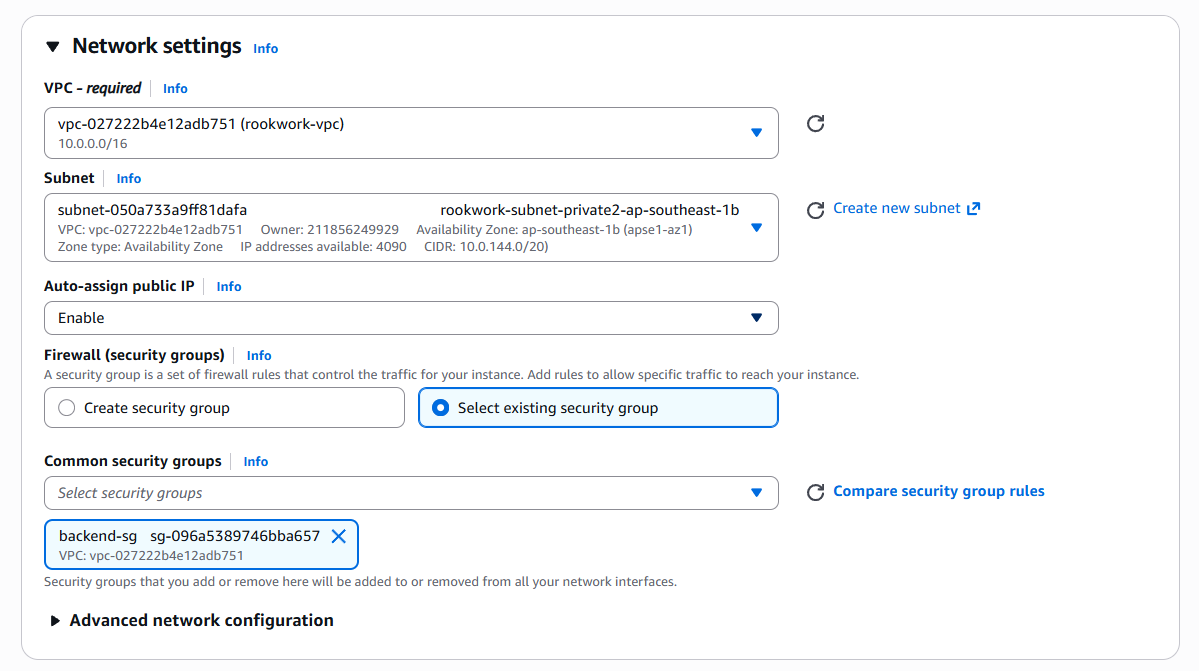
rookwork-ec2-2. - In Network settings, choose the same VPC but select the second Private Subnet (e.g.,
rookwork-private-subnet-2) for high availability across different Availability Zones. - Keep Auto-assign public IP as Disable.
- Assign the same security group or a corresponding private security group.
- Launch the instance.
Step 5: Connect and Verify the Private Environment
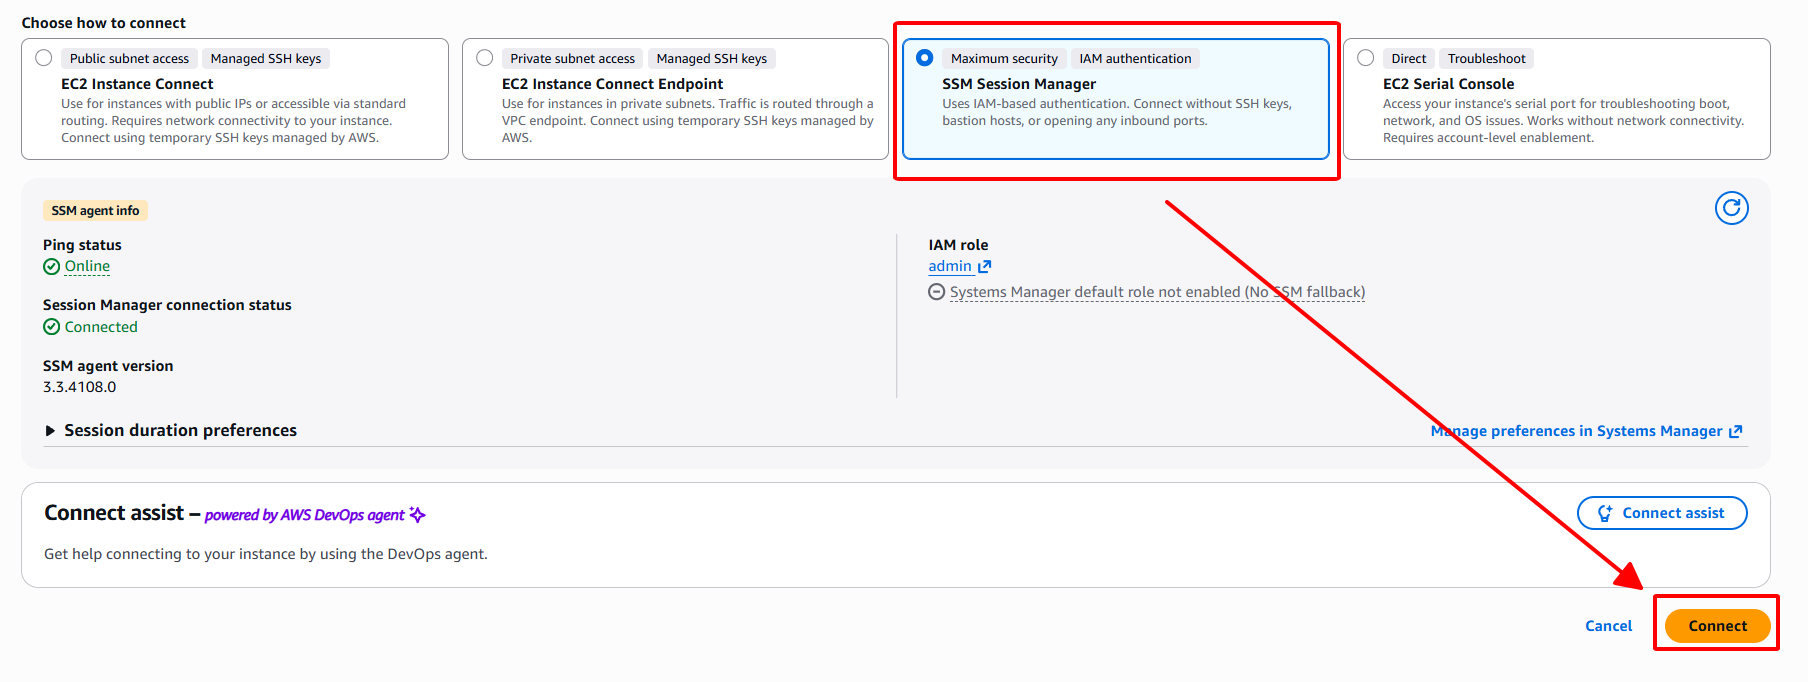
Since both EC2 instances are in private subnets, they do not have public IP addresses and cannot be accessed directly via SSH from the public internet. We will connect to the instance using AWS Systems Manager (SSM) Session Manager.
- In the EC2 instances list, select the instance you want to connect to (e.g.,
rookwork-ec2-2) and click the Connect button at the top right.

- Switch to the Session Manager tab and click the orange Connect button at the bottom right to establish a terminal session.
Step 6: Verify Configurations and Environment
Once the terminal session is successfully established, execute the following verifications:
1. Verify Internet Connectivity (via NAT Gateway)
To ensure the route table for private subnets redirects outbound traffic to a NAT Gateway (enabling packages to be updated and library downloads):
ping -c 3 google.com

2. Verify Installed Software / Dependencies
Run version check commands to ensure the required runtimes and tools for the Rookwork application are installed and ready:
Docker:
docker --versionIf not installed, run the following commands to install:
sudo dnf update -y sudo dnf install -y docker sudo systemctl start docker sudo systemctl enable docker sudo usermod -aG docker $USERNode.js:
node --versionIf not installed, run the following commands to install via NVM:
curl -o- https://raw.githubusercontent.com/nvm-sh/nvm/v0.39.7/install.sh | bash source ~/.bashrc nvm install 20Git:
git --versionIf not installed, run the following command to install:
sudo dnf install -y git